
5 Things You Must Do to Prepare For the New YouTube One Channel Layout 2013
/
The new YouTube One Channel layout has been available for a month or two now, but only on an opt in basis. Over 100 million users have already made the switch, but from June 5th, all channels will be automatically and permanently moved to the new design, whether they're ready for it or not! The last thing you want is for your channel and its branding to look out of sorts when the switch happens, so here are 5 Things You Must Do to Prepare For the YouTube One Channel Layout. These simple steps to get yourself ready ahead of time and take advantage of the benefits of the new layout as soon as possible.
1. Opt In Now
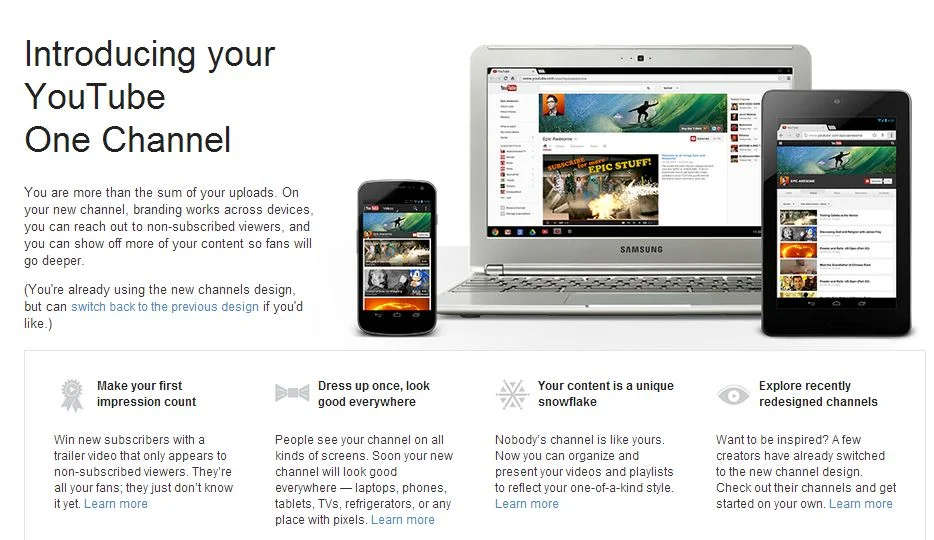
To be ready before the automatic switchover (and make use of the next four pointers), opt in to the YouTube One Channel layout now by visiting http://www.youtube.com/onechannel. Have a read through the overview provided if you wish, bid farewell to your old channel layout one last time, then hit the button at the bottom of the page to upgrade.
2. Upload A Channel Icon

Once you're upgraded, upload a square, high-resolution (800px x 800px) image for your channel icon; a pic that is also recognisable at smaller resolutions. This image will be your channel’s icon all over YouTube - in search results, comments, and on your Channel Art (explained next).
3. Upload Channel Art
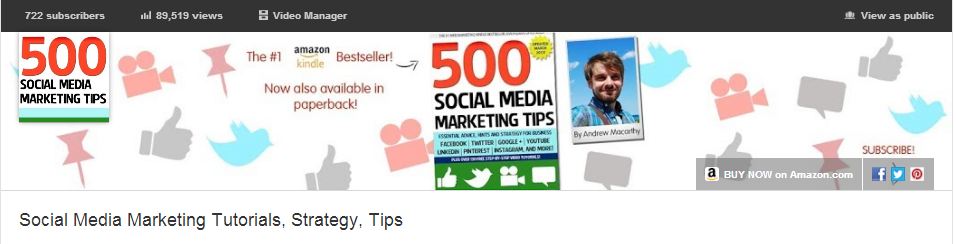
The One Channel design ditches the background branding of old and opts instead for a simple cover image known as your Channel Art. Your YouTube channel's icon sits on top of it, and you can also add clickable icons to your website and social media profiles. To get started, hover over your channel art place holder and click the pencil icon that appears in the top-right corner. In the drop-down menu, click "Edit Channel Art" and "Edit Links" respectively.
The most effective YouTube Channel Art is an image that is optimised to display well on whichever resolution it is being viewed. To ensure yours looks great on screens from mobiles to HD televisions, use the guidelines in my template, which you can download here: Social Media Templates Page.
4. Create A Channel Trailer
The new YouTube channel pages have two primary ways of displaying video content in the Home tab: through the Browse view or through the Activity Feed. The Activity Feed broadcasts your activity on YouTube to your subscribers, while the Browse view two different "sub-views": a view for subscribers, and a view for viewers who have not yet subscribed to your channel. For this reason, the Browse view is my preferred default, but it needs to be enabled first. Here's how:
1. Hover your cursor over the menu bar that contains the 'Video', 'About', and 'Discussion' tabs on your Channel Page.
2. Click on the pencil icon that appears to open the Channel Navigation menu.
3. From here, click the button to enable the Browse feed, and then click Save. Go back to your Channel page and you'll be able to add a trailer over a place holder.
For instructions about how to create a great channel trailer to entice in new subscribers, watch my tutorial video above.
5. Add Sections
Sections are a way for you to organise your videos into groups on your channel page, and they can either be built manually or created dynamically from video tags, likes, etc. Use sections to highlight your best content, both to subscribed and non-subscribed viewers. To begin, scroll to the bottom of your channel page and click the "Add a section" button.
Conclusion
So there you have it, a handful of simple and effective ways you can help make your brand's transition to the YouTube One Channel layout as painless as possible, and hopefully increase your audience at the same time. What are your thoughts on the new YouTube layout? Let me know in the comments below!
ABOUT THE AUTHOR
Buy 500 Social Media Marketing Tips (Kindle or Paperback)
Amazon US: http://www.amazon.com/dp/B007L50HE6
Amazon UK: http://www.amazon.co.uk/dp/B007L50HE6
Follow Me:
http://www.facebook.com/500socialmediatips/
https://pinterest.com/500socialmedia/
http://www.twitter.com/500socialmedia
http://www.youtube.com/500socialmediatips